
Exporting Images from Photos to use for Your Website
Exporting your photos so they show up clear and don’t bog down your website is important. This brief tutorial goes over the export settings used for Photos using OSX El Capitan (most recent operating system at the time of this post).
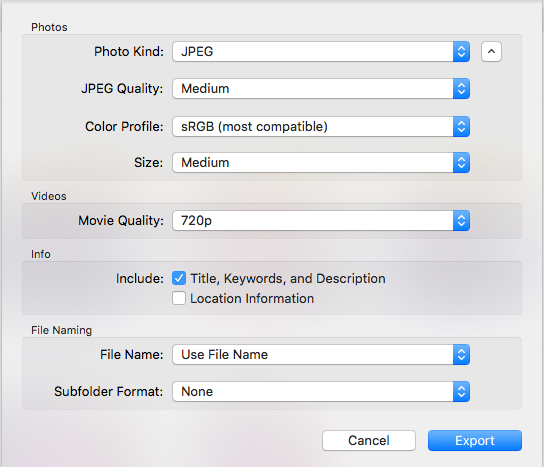
First, select all of the photos you need to export and go up to File –> Export –> “Export __ Items”. The export settings box will appear. Your photos should be set to jpeg and the color profile should be sRGB. These are great for web.
If you are using these photos for a blog post then setting everything to medium resolution and medium size is perfect.
If this is going to be used for a large slider or portfolio then your settings should be “High” and the size should be set to “Large”. You may need to play around with the size to see what best fits your website.
It is important to note that the “Subfolder Format” be set to “none”. This will keep all the photos into one folder instead of multiple folders named after each moment.
From here, click the “Export” button and save them to your specified folder.